Static Stock Basket
So, let’s continue from where we left off in the last article.
Let’s start with a very simple strategy – one that invests in a pre-defined basket of 10 stocks, weighs them according to their Earnings yield (value tilt), and rebalances on the 1st of every month.
The first step is to go to the strategy page. Start with Create New, then select Stock. You will see three options.
As we are creating a static stock basket, we will select the first option as highlighted in the green in the image below. And then we will click on the next step at the bottom right. Do note that after each step we will be moving to the next step by clicking the same button available at the bottom right.
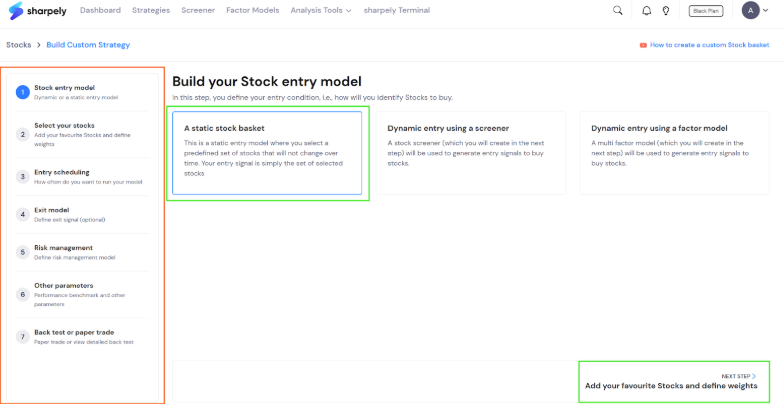
One other important thing to note here is that as per the type of your strategy, you will be able to see all the steps of the workflow on the left side(highlighted in red). This section will also help you in knowing in which step you currently are.
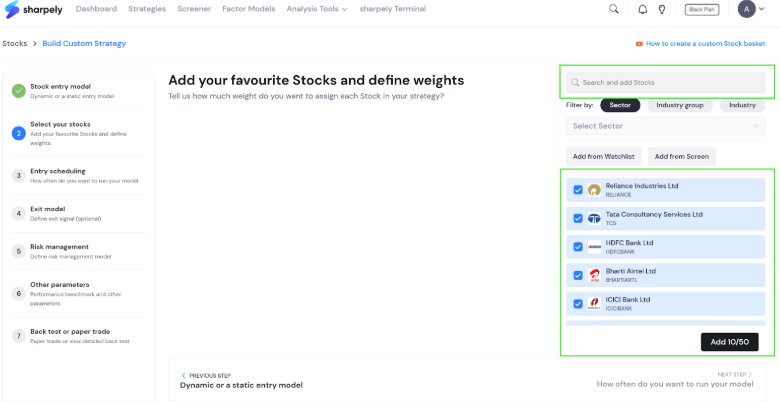
Now we will click on the next step button. In the second step, we will need to select stocks. And there are multiple ways to do it.
The first is you can search and add stocks manually as highlighted in green in the below image. You can type any name and just click on it in the dropdown below.
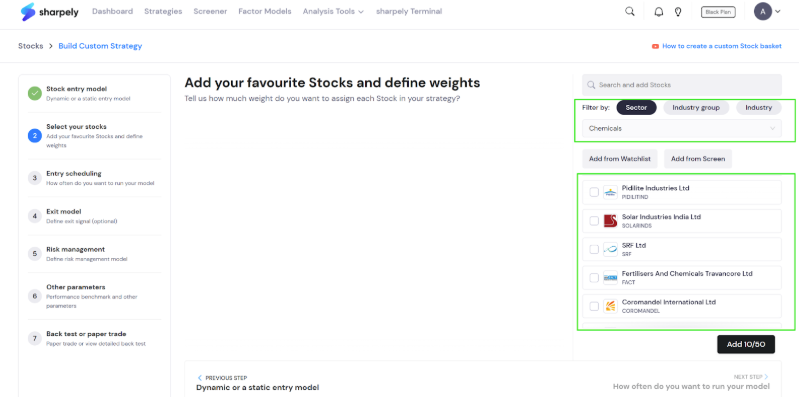
But what if you want to add multiple stocks from the same sector, industry group, or industry? We have got you covered there as well. You can simply select the sector or industry group or industry and all the stocks will be available for selection as shared in the screenshot below.
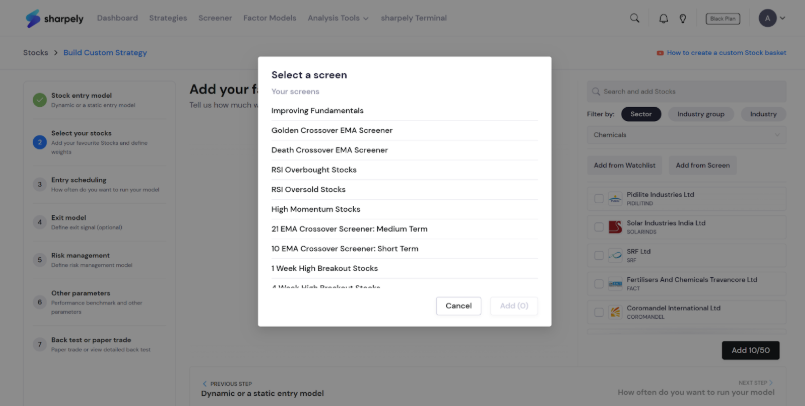
And that is not it. You can also import all the stocks from the watchlists or screens you have created as shown below. Once you click on the screen, a list of screens will be visible and you will just need to click on the name and you will be able to select stocks from the screened list.
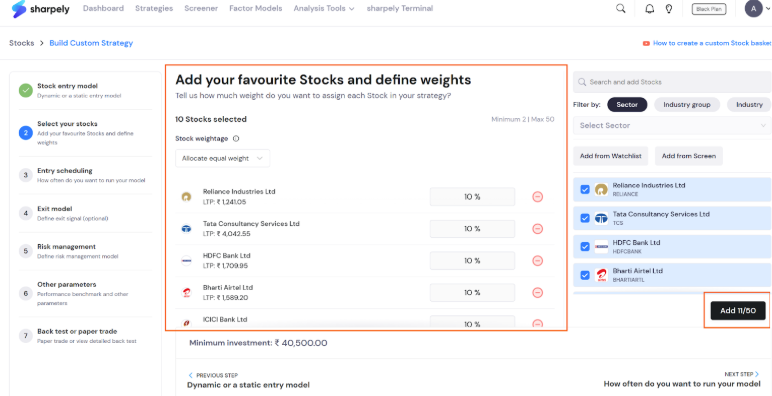
Once you select all the stocks, just click on the add button as shown in red in the image below. Once you hit add you will be able to see the stocks and their weightage as shown in orange.
You can assign equal weights to stocks or assign weight by any metric of your choice. In our example, we are going to assign weight by the metric ‘earnings yield’. To do that simply click on the ‘Stock weightage’ dropdown as highlighted in green select ‘weight by metric’ and then select earnings yield as shown. You can use the actual values or inverse values as per your preference (as highlighted in red).
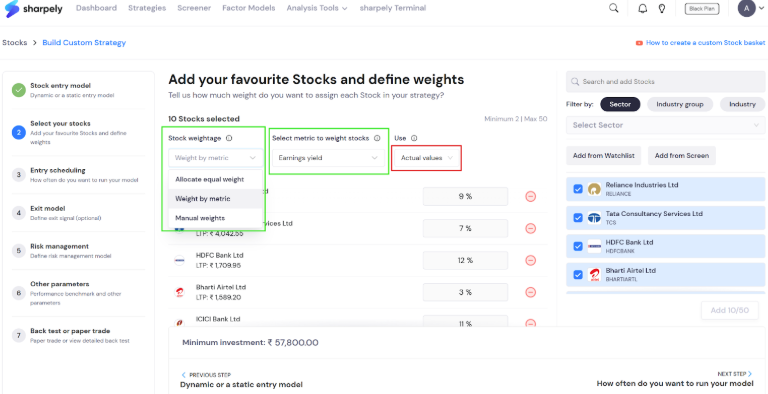
As you can see weights are assigned as per the metric of your choice. You can also assign the weights manually if you want to.
And that is it. The next step is entry scheduling. We have discussed all the remaining steps in detail in an article series on strategy parameters. You can read them here.